
Winter light is deceptive. The sun sits lower than in summer, the sky is often overcast, and golden hour lasts longer but feels less dramatic. Most photographers dismiss winter light as flat and gray. That’s a mistake. The winter months offer one of the year’s best portrait and landscape windows if you understand how winter light behaves.
Why Winter Light Is Different
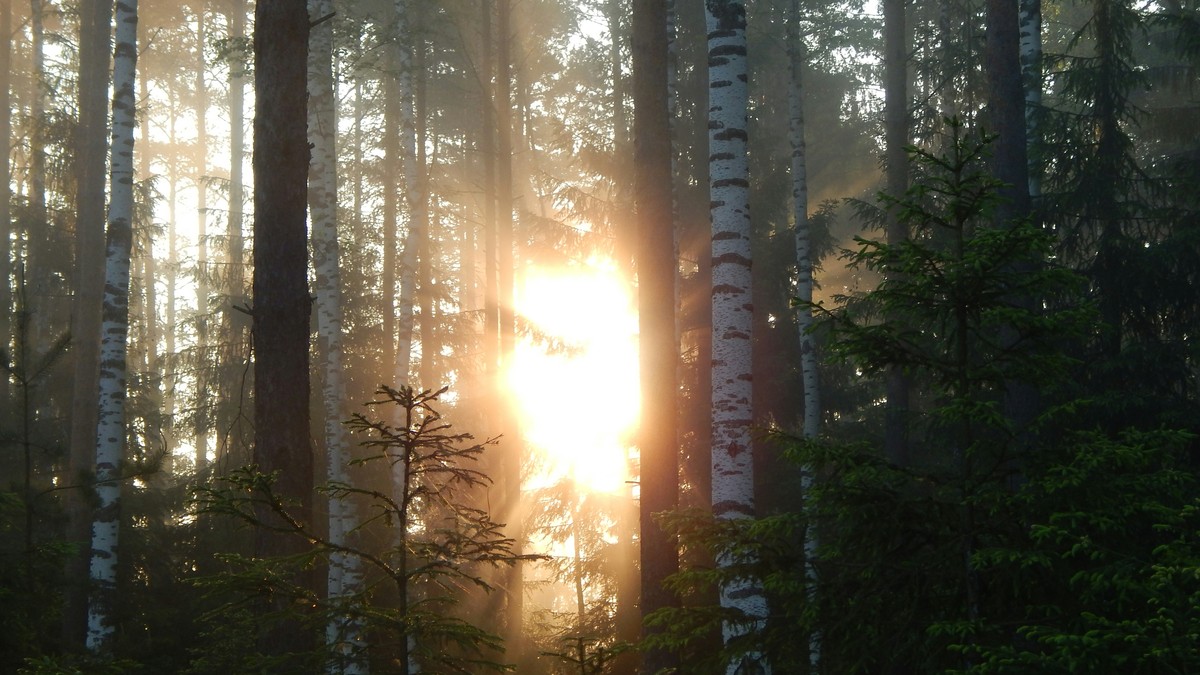
In winter, the sun rises and sets at dramatic angles. In most temperate locations, solar altitude at noon barely exceeds 20-25 degrees. near the horizon. This creates extended golden and blue hours where the sun remains low across more of the shooting day. Midday doesn’t mean harsh overhead light; it means soft, directional light still.
Overcast skies are your friend. Cloud cover diffuses winter sun into soft fill light. Underexposed sensors struggle with gray winter skies; properly exposed, they become ethereal backdrops. The reduced color temperature (more blue in shadows) feels cold and contemplative, not warm and summery. but that’s aesthetically powerful for the right subjects.
Understanding Winter Color Temperature
Winter sun sits lower in the atmosphere. Light travels through more atmospheric particles, scattering shorter blue wavelengths. The result: golden hour feels more golden than summer’s golden hour. Shadow areas stay cold and blue. This warm-cool contrast is visually striking if you embrace it instead of fighting it.
White balance strategy: shoot in daylight or cloudy modes (around 5500-6500K). Don’t correct toward warm in post. let winter’s natural cool blues live in shadows. The temperature gradient becomes narrative. That cold, blue shadow? It reads as winter. The warm rim light on a subject’s shoulder? It contrasts beautifully.
Golden Hour Timing in Winter
Calculate your location’s golden hour using sites like Golden Hour Calculator or most camera apps. Golden hour starts roughly 45-60 minutes before sunset and lasts longer than summer (sometimes 90 minutes). Plan around this window. In winter, golden hour might run about an hour before sunset. That’s actually a reasonable time for portraits and events, unlike summer’s late evening window.
Bring a headlamp or small reflector with built-in LED. As the sun sets, ambient light drops quickly. A subtle boost from a reflector or small key light extends your usable window by 20 minutes without artificial look.
Positioning Subjects in Winter Light
Backlit and Rim Light Positioning
Winter’s low sun creates beautiful rim lighting naturally. Position subjects with the sun behind and slightly to one side. The low angle ensures rim light kisses hair and shoulders without direct lens flare. Fill shadows with reflectors or off-camera flash (subtle. just 1-2 stops below ambient). This backlit setup is hard in summer; it’s natural in winter.
Side Light for Texture
When shooting landscapes or detail shots, position the sun 90 degrees to your lens. Winter’s low angle brings out texture in bark, frost, and soil dramatically. Side light at this angle creates dimensional depth impossible to achieve with overhead sun.
Front Light with Shadows
Position subjects facing the setting sun (or with sun slightly camera-left). The low angle doesn’t create the harsh shadows of summer front-lighting. Shadows fall more gently. Cold blue shadows surrounding warm-lit skin and fabrics become a signature look. dramatic but not brutal.
Exposure Strategy for Winter Skies
Winter skies are often luminous gray. Use spot metering on your subject’s face, not the sky. If you meter the sky, your subject underexposes. Expose for the subject; let the sky fall into gray tonality. This preserves detail in faces and clothing while keeping skies detailed rather than blown.
If the sky is blown (pure white), it’s usually recoverable slightly in RAW processing. If faces are underexposed, recovery looks noisy and unnatural. Prioritize subject exposure always.
Using Winter’s Low Contrast for Storytelling
The reduced dynamic range of winter. fewer extreme shadows and highlights. simplifies composition. Your eye focuses on shape and form rather than tonal drama. Use this to emphasize compositional geometry: leading lines in frost patterns, the layering of bare trees, the pattern of a subject’s clothing against a simplified background.
This lower contrast also means less need for graduated filters or exposure blending. Your camera captures the full dynamic range in a single frame more reliably than summer. Spend less time managing contrast and more time composing.
Handling Overcast Conditions
Not all winter days offer clear skies. Overcast light is soft and directional without harsh shadows. It’s ideal for color saturation and skin tone. Increase saturation slightly in post-processing; overcast days naturally reduce vividness. This is the time for rich blues, deep greens, and skin tones that don’t look overlit.
Watch for overcast light with breaks. clouds clearing on the horizon creating a thin golden band. Position subjects to backlight them with this light. The contrast between bright backlight and dark overcast foreground is visually extraordinary.
Practical Shooting Checklist
- Calculate golden hour window; plan shoot within it
- Use daylight or cloudy white balance; preserve winter’s cool shadows
- Bring reflectors and small light sources; golden hour ends fast
- Expose for subject, not sky
- Position subjects to use rim light and side light naturally
- Compose for shape and texture, not just tonal contrast
- Keep post-processing minimal; winter light is already narrative-strong
Winter light rewards technical understanding and intentional positioning. Don’t wait for summer’s dramatic light. The best light for your vision might be the one you’re overlooking this season.