
Flat photos usually come from flat light, not from a bad camera.
When you learn to notice direction, contrast, and colour, your images improve fast.
This guide teaches simple light habits you can use anywhere, starting today.
When people feel disappointed in their photos, they often blame the camera. The truth is that modern cameras are capable, but light still runs the show. Light decides whether an image has depth, texture, mood, and life.
The good news is that you can improve your photos without buying anything. You need to learn how to see light and how to move yourself (or your subject) in relation to it.
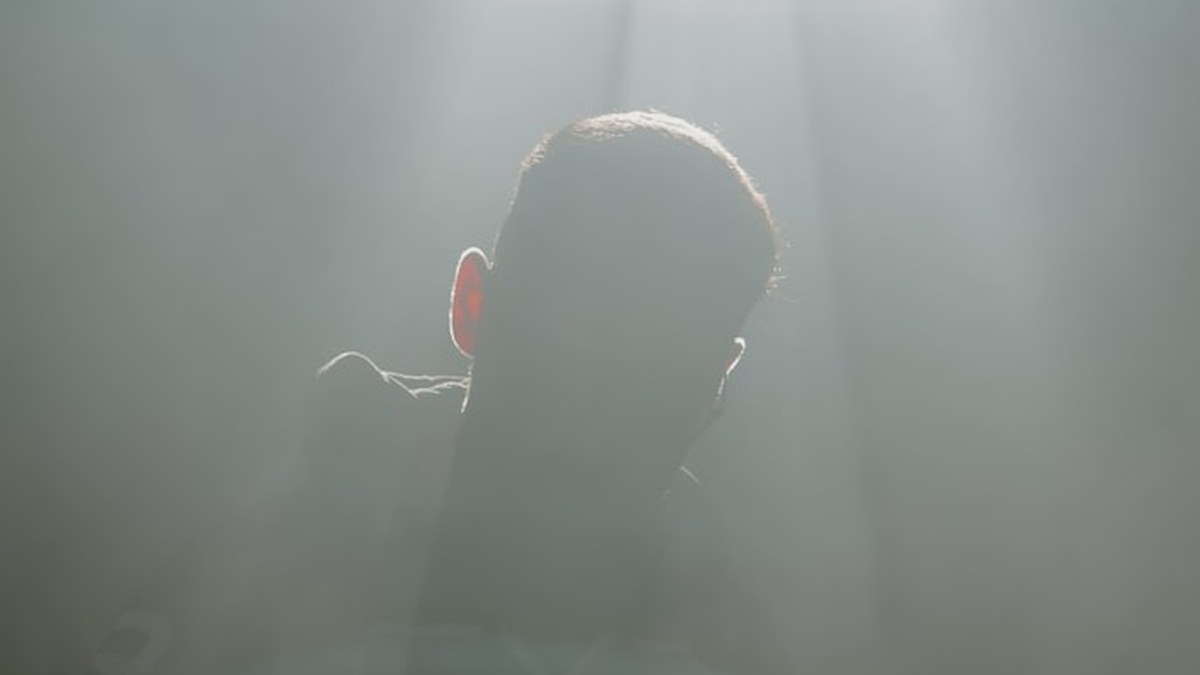
Start with one question: where is the light coming from?
Direction is the first thing to notice. Light from straight overhead tends to flatten faces and create harsh shadows under eyes and noses. Light from the side creates shape. Light from behind can create glow and drama if you expose carefully.
If you want a deeper conceptual foundation for how light works, Camera history and a light concept offers a helpful way to think about light as the core ingredient of photography.
Use window light like a free studio
A window is a soft, large light source. Place your subject near the window, then move them slowly: facing the window, turned 45 degrees, then side-lit. Watch how their face changes. That change is the difference between flat and dimensional.
If the light is too harsh, diffuse it with a thin curtain. If the shadow side is too dark, bounce a little light back with a white wall or a piece of paper.
Learn three lighting “looks” you can repeat
Rather than memorising technical rules, learn three looks you can create almost anywhere:
- Side light: subject turned slightly away from the light for depth.
- Back light: subject between you and the light for rim glow.
- Open shade: subject in shade facing a bright open area for soft skin tones.
Once you can recognise and repeat these, your photos become consistent, which is what people read as “good”.
Stop over-brightening everything
Many flat photos are overexposed on purpose because the camera tries to make everything mid-tone. Brightening lifts shadows and reduces contrast, which removes depth. Sometimes the better move is to let shadows stay shadows.
Try underexposing slightly when you have bright backgrounds or strong highlights. Protect the highlights and allow the mid-tones to fall where they may. The image often looks richer.
Train your “camera brain”
Photography is partly a mental skill: learning to see what the camera will record. When you can visualise the final image before you press the shutter, you stop taking random shots and start making choices.
The camera brain and visualization explores that idea in a way that can help you build stronger intention behind your framing and timing.
Fix the background to fix the photo
Flatness isn’t only light. It can also be a busy background that competes with the subject. When the frame is full of clutter, the subject doesn’t “pop” no matter how good the light is.
Use a simple habit: before you shoot, scan the edges of the frame. Move your feet to remove distractions. A small shift can create a clean, calm background that supports the subject.
Use contrast on purpose
Depth comes from contrast: light against dark, sharp against soft, warm against cool, near against far. You can create contrast by moving the subject away from the background or by choosing a background that’s darker than the subject.
Portrait tip: place the subject a few feet from the background if you can. Even with a phone, that separation helps the camera blur or simplify the background, creating a sense of depth.
Don’t let your photos stay trapped on one device
When you start shooting with more intention, your photos become more valuable. That’s the moment to protect them with a simple saving habit so your work doesn’t disappear with a broken phone.
If you need a practical plan, The best way to save digital pictures is a good guide for building a dependable backup routine.
A one-week light practice
If you want to improve quickly, do a one-week practice. Each day, take five photos of the same kind of subject – your coffee, a family member, a plant – using a different light direction. Name the light in your mind: “side”, “back”, “open shade”.
By the end of the week, you’ll start recognising good light as you walk around. That’s when photography becomes fun again. You’re no longer hoping the camera makes something look good. You’re choosing light, and light is what makes the image.